

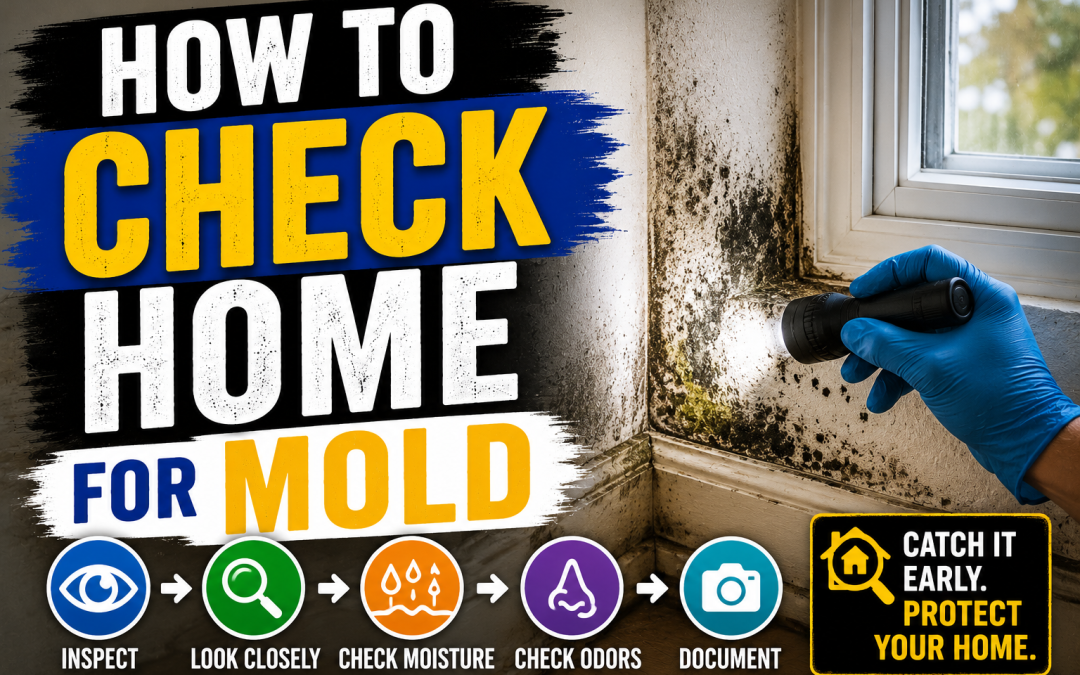
A lot of Florida homeowners start asking how to check home for mold the same way. A summer storm rolls through Bradenton or Sarasota, the AC runs nonstop, everything looks dry again, and then a damp, earthy smell hangs around in one room. It might be a closet near an exterior wall, the hallway by the air handler, or a guest bathroom that never seems to dry out.
That concern is valid. On the Suncoast, mold problems often begin with moisture you can’t fully see. Wind-driven rain, high indoor humidity, sweating ductwork, roof leaks, and slow plumbing drips all create the kind of conditions mold needs. By the time you see staining or spots, growth may already be established behind drywall, under flooring, or inside the HVAC system.
Homeowners don’t need to panic, but they do need a method. A useful mold check starts with what your house is telling you, then moves to the areas that fail most often in Florida homes, and finally to the hard question of whether a simple cleanup is enough or whether you need documented professional inspection for safety and insurance reasons.
Is That Musty Smell a Sign of Mold? A Homeowner’s Guide
A musty smell after a storm doesn’t always mean you have a major contamination issue. But it does mean something in the home stayed wet longer than it should have. In Bradenton, Lakewood Ranch, and nearby Gulf Coast neighborhoods, I see this pattern often after roof leaks, AC drain backups, and wind-blown rain around windows and lanais.
When people search how to check home for mold, they’re usually not starting with visible black growth. They’re starting with uncertainty. The house smells off. One room feels damp. A family member notices more irritation indoors than outdoors. That’s the right time to investigate, because mold is easier to deal with when you catch the moisture source early.
What that smell usually means
That earthy odor is a warning sign, not a diagnosis. Mold growth, damp building materials, wet insulation, and dirty HVAC components can all contribute to the same stale indoor smell. The key is to connect the odor to moisture history.
Ask yourself a few practical questions:
- Recent water event: Did you have a roof leak, plumbing leak, appliance overflow, or storm intrusion?
- AC behavior: Has the system been short-cycling, running constantly, or leaving rooms clammy?
- Room pattern: Is the smell strongest near an exterior wall, under a sink, by a return vent, or in a closet?
- Timing: Does the odor worsen after rain or when the home has been closed up all day?
If you’re also trying to separate mold concerns from broader indoor air issues, these Boston Budget Plumbing air quality tips give a useful homeowner-level overview of ventilation, humidity, and household contributors that can overlap with mold symptoms.
A musty smell is usually a moisture story first. Find out what stayed wet, and you’re closer to finding the mold.
Start with signs, not assumptions
One mistake homeowners make is jumping straight to a test kit before doing a visual and moisture-focused check. Another is wiping down a small visible spot and assuming the problem is gone. If the material behind that surface is still damp, the growth often comes back.
If you’ve already noticed staining, bubbling paint, recurring spotting, or that persistent earthy smell, it helps to compare what you’re seeing with these five signs of mold damage in homes. That kind of quick pattern recognition often tells you whether you’re dealing with a surface issue or a hidden moisture problem.
Beyond the Black Spots: Key Signs of a Hidden Mold Problem
Most homeowners expect mold to look obvious. Sometimes it does. Often it doesn’t. A hidden mold problem usually shows up through a combination of what you smell, what you see, and how the house affects you.
The EPA says there are no established safe levels or regulatory standards for mold, which is one reason testing has limited value if all you need is confirmation that mold is present. In practice, the EPA says assessment should focus on visual inspection of moisture problems and removal of the mold rather than sampling alone, as explained in the EPA’s guidance on who can test or remediate mold in a home.
What you smell
Odor is often the first clue.
- Musty or earthy smell: This is the classic signal. It tends to linger in closed rooms, closets, under sinks, near air returns, and around damp flooring.
- Smell that intensifies with AC use: That can point toward contamination in ductwork, around the air handler, or in building cavities affected by airflow.
- Room-specific odor: If only one bathroom, bedroom, or cabinet smells wrong, focus there first instead of assuming the whole home is affected.
What you see
Visible growth is only one visual clue. Water damage often shows itself before mold does.
- Spots or staining: Dark specks, fuzzy patches, or irregular discoloration on drywall, baseboards, caulk, vent covers, or wood trim.
- Peeling or bubbling paint: Moisture behind painted surfaces can trap humidity and support growth on the backside of drywall.
- Warped materials: Swollen baseboards, soft drywall, cupping floors, and stained ceiling texture all deserve a closer look.
- Condensation pattern: Repeated moisture on windows, supply boots, or cold walls often points to humidity imbalance.
If you’re seeing subtle wall changes and aren’t sure whether they point to moisture intrusion, this guide to signs of water damage in walls helps separate cosmetic wear from a real leak-related problem.
How you feel indoors
Physical symptoms aren’t a mold test, but they can help you connect the dots.
- Indoor irritation: Sneezing, congestion, watery eyes, throat irritation, or headaches that seem stronger in one part of the home.
- Pattern-based discomfort: If symptoms improve when you leave the house and return indoors, pay attention to where that shift happens.
- Sensitive occupants: Children, older adults, and people with respiratory concerns usually notice poor conditions first.
Don’t judge a mold issue by color alone. Some serious problems look like faint staining, peeling paint, or a damp wall that never quite dries.
A Pro’s Checklist for Inspecting High-Risk Areas
A useful answer to how to check home for mold isn’t just “look around.” You need to inspect the parts of the house that stay damp, trap condensation, or hide leaks. In Florida homes, that usually means bathrooms, kitchens, laundry areas, HVAC components, attic transitions, and any wall or floor assembly near a recent water event.
Bathrooms and laundry areas
These are the easiest places to overlook because moisture feels normal there. It isn’t normal when surfaces stay damp long after use.
Check these points carefully:
- Under vanities: Look for staining, swollen cabinet bottoms, and dampness around supply lines and drain connections.
- Toilet bases: Check for loose caulk, staining at the floor, or a soft area that suggests a wax ring leak.
- Shower walls and grout lines: Surface spotting may be simple mildew, but cracked grout and soft drywall nearby can point to intrusion behind the finish.
- Around exhaust fans: Poor ventilation leaves ceilings and upper walls wet longer than they should be.
- Laundry hookups: Inspect hose bibs, drain lines, and the wall behind the washer for drips or discoloration.
Kitchens and plumbing walls
Kitchen mold usually starts with small leaks people ignore for too long.
Look at:
- Sink cabinet interiors: Use a flashlight on the back wall, supply valves, disposal connections, and the cabinet floor.
- Dishwasher area: Check for warped toe-kick trim, cupped flooring, or soft subfloor near the front corners.
- Refrigerator water line: Even a slow drip can wet drywall and cabinetry.
- Exterior kitchen walls: In humid weather, cool indoor air and warm outdoor moisture can create condensation around penetrations.
Closets, windows, and exterior-facing rooms
Florida homes often develop hidden growth in places with limited airflow.
Watch for:
- Closets on exterior walls: Especially when packed tightly with clothing and no air circulation.
- Window perimeters: Staining, damaged sills, and recurring condensation can point to failed seals or water intrusion.
- Furniture against outside walls: Pull it forward and inspect the wall and baseboard behind it.
- Guest rooms: These often stay closed, under-conditioned, and humid.
HVAC systems and duct paths
Many homeowners often miss the underlying problem. In Florida’s humid, AC-reliant homes, HVAC systems are a major vector for hidden mold. Infrared camera data from the Tampa Bay area showed 40% of inspected systems harbored growth despite clean filters, and the CDC noted a 15% increase in respiratory cases linked to undetected HVAC mold in Suncoast post-hurricane zones in 2025-2026, according to this report on checking a house for mold and HVAC-related spread.
That means a clean vent grille or fresh filter doesn’t clear the system.
Inspect:
- Supply and return vents: Remove the grille if needed and look for growth on the metal, drywall edge, or insulation nearby.
- Air handler closet: Check the drain pan, condensate line, surrounding drywall, and platform.
- Flexible duct runs: Look for sagging sections, insulation damage, or signs of condensation.
- Rooms far from the unit: Mold odors that show up in distant bedrooms can still originate in the duct system.
If the smell gets stronger when the AC starts, don’t stop at the vent cover. Check the air handler area and the moisture conditions feeding the system.
For a local example of what a documented inspection process looks like in this climate, homeowners often compare notes with providers offering mold inspection in Tampa Florida, where HVAC and concealed moisture checks are part of the concern.
Attics, crawlspaces, and garage-adjacent areas
These spaces usually hide the moisture history of the home.
| Area | What to inspect |
|---|---|
| Attic | Roof sheathing staining, wet insulation, bathroom exhaust discharge, and dark growth near soffit transitions |
| Crawlspace | Damp soil conditions, joist staining, insulation sagging, plumbing penetrations, and musty trapped air |
| Garage wall shared with house | Water heater area, hose bib penetrations, and any wall that backs up to laundry or kitchen plumbing |
DIY Mold Testing: What Works and What to Avoid
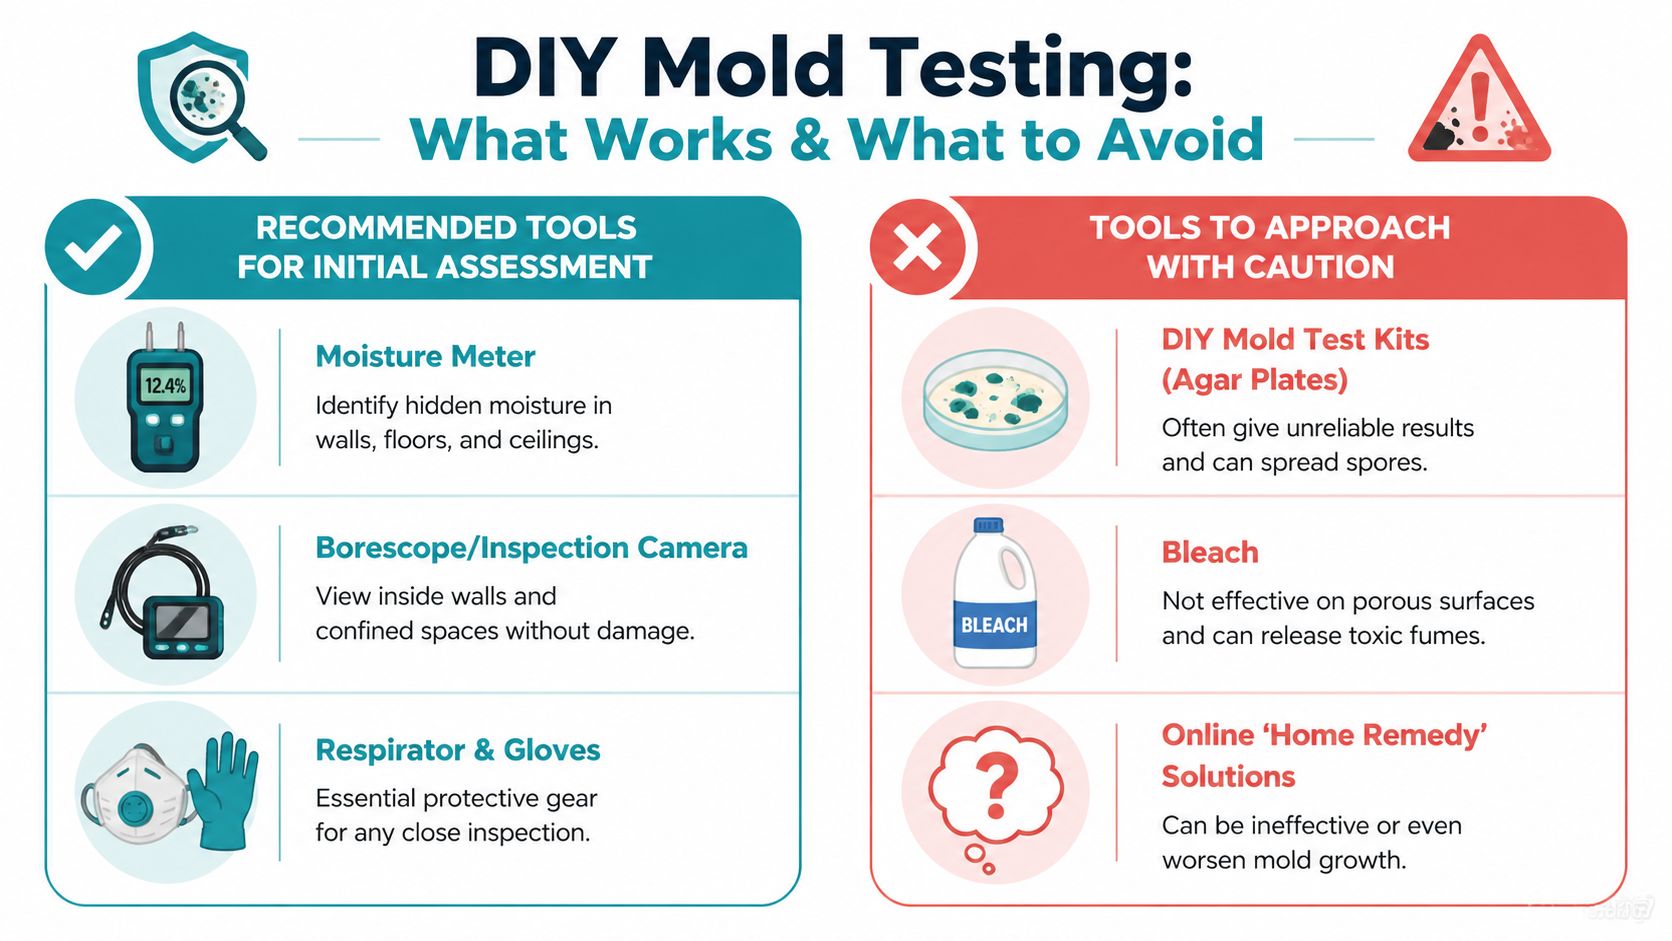
After a visual inspection, most homeowners want proof. That’s understandable. But if you’re learning how to check home for mold, it helps to separate useful DIY tools from products that create more confusion than clarity.
Tools that actually help
A few homeowner tools are worth having because they help locate moisture, which is the primary driver.
- Flashlight: A bright flashlight reveals staining, texture changes, and cabinet damage that overhead lighting hides.
- Moisture meter: This is one of the most practical DIY tools because it helps you compare suspected damp areas to dry materials nearby.
- Borescope or inspection camera: Useful for viewing inside tight voids with minimal disturbance.
- Respirator and gloves: If you’re checking a suspicious area closely, protect yourself before disturbing dust or growth.
Some restoration companies, including AMPM’s overview of mold assessment vs mold remediation, also explain why finding moisture conditions and source areas matters more than just confirming a colony on the surface.
Where DIY test kits fall short
DIY mold kits with petri dishes, strips, or swabs are accessible, but they’re limited. Certified inspectors use calibrated air pumps to pull a known volume of air for lab analysis, and professional reports measure spore counts per cubic meter while identifying specific genera such as Stachybotrys, Aspergillus, Penicillium, Cladosporium, and Alternaria, as outlined in this article on how to test indoor air quality for mold.
A homeowner kit usually can’t do that accurately. It can tell you that mold exists in the environment, but in Florida that isn’t a very high bar. Mold spores are common outdoors, and they enter homes constantly.
What that means in practical terms:
- A positive dish doesn’t prove an indoor source.
- A negative result doesn’t rule out hidden mold behind walls or under floors.
- Surface swabs don’t tell you the extent of contamination in a building assembly.
- Consumer kits don’t create the kind of documentation insurers or contractors may need.
Practical rule: Use DIY tools to find dampness and visible clues. Don’t use a consumer kit as the final word on whether you have a serious mold problem.
Avoid these common mistakes
- Spraying bleach on porous materials: It often doesn’t solve the underlying issue in drywall, wood, or insulation.
- Cutting into a suspect wall without containment: You can spread spores and dust through the house.
- Testing without an outdoor comparison: Presence alone tells you very little.
- Cleaning first, investigating later: Once evidence is disturbed, it’s harder to document where the moisture came from.
DIY vs. Professional Inspection: Knowing When to Call for Help
A homeowner can do a careful first-pass inspection. That’s often enough to catch a minor issue early. But there’s a point where continuing DIY work stops being smart and starts risking missed damage, cross-contamination, or weak documentation.
Stop and call a professional if you see these triggers
- Recurring mold in the same place: If you clean it and it returns, the source wasn’t removed.
- A strong musty odor with no visible source: That often means concealed growth in a wall cavity, under flooring, or in the HVAC path.
- Water damage history: Roof leaks, plumbing failures, storm intrusion, or AC overflow almost always justify a deeper check.
- Health sensitivity in the home: If someone in the house is reacting indoors, guessing isn’t enough.
- HVAC involvement: Once you suspect duct or air handler contamination, casual cleaning won’t answer the underlying question.
- Real estate, tenant, or insurance documentation needs: You need a reportable inspection process, not a homeowner hunch.
What professional inspection adds
A professional inspection isn’t valuable just because it uses more equipment. It’s valuable because it combines moisture investigation, air movement understanding, comparative sampling when needed, and interpretation.
Professional mold inspection protocols establish that indoor spore counts should be at least 50% lower than outdoor baseline readings to indicate a healthy indoor environment, based on comparative spore trap testing discussed in this guide on how to test your home for mold. That benchmark matters because indoor air by itself doesn’t tell the whole story. Outdoor mold conditions on the Gulf Coast can already be high.
A trained inspector also knows the limits of sampling. Some problematic molds are less likely to stay airborne, and low air counts don’t automatically rule out hidden growth. That’s why professionals pair testing with moisture meters, thermal imaging, humidity readings, and direct inspection of suspect assemblies.
Why documentation matters in Florida
Insurance questions often hinge on cause, timeline, and whether the issue ties back to a covered water event. A homeowner with phone photos and a petri dish result may still struggle to show what happened. A documented inspection can help establish whether the problem stems from storm damage, a plumbing failure, long-term humidity, or deferred maintenance.
If your situation involves recurring growth, a hidden source, or any likely remediation work, this resource on when do I need professional mold removal is a practical next step.
Your Next Steps for a Mold-Free Home in Florida
Florida homeowners don’t get much margin for error with moisture. Our climate gives mold a head start, especially after storms, plumbing leaks, AC issues, and days of heavy humidity with the house closed up. That’s why learning how to check home for mold matters. Not as a one-time chore, but as part of protecting the home year-round.
The most important step is speed. The probability of mold growth spikes by 80% following a water event that is not thoroughly dried within 24-48 hours, according to this guide on DIY steps to assess for home mold. In Bradenton, Sarasota, and the rest of the Suncoast, that window matters because humid air keeps materials from drying as quickly as people think.

A practical plan after you find suspicious signs
If you notice odor, staining, or damp materials, take these steps in order:
-
Document the area
Take clear photos of stains, warped materials, or visible growth. Note when you first noticed the issue and whether it followed rain, a leak, or AC trouble. -
Limit disturbance
Don’t start scrubbing, sanding, or opening walls right away. Disturbing growth can spread contamination and erase useful evidence. -
Control moisture
If there’s an active leak or overflow, stop the water source if you can do so safely. Improve ventilation and avoid letting the area stay closed and damp. -
Decide whether the issue is small and isolated
A minor surface issue on a non-porous area is one thing. Hidden odor, recurring staining, affected drywall, or HVAC involvement is another.
For homeowners researching cleanup methods, this overview of proper mold removal techniques is a useful reminder that drywall and other porous materials often require more than surface wiping.
What a professional response should include
A proper mold response should do more than identify spots. It should trace the moisture source, inspect concealed areas when warranted, document conditions, and create a plan that matches the material affected. In Florida homes, that often means checking not just the visible room but also the nearby duct path, insulation, adjacent plumbing wall, and surrounding humidity conditions.
That matters for homeowners, landlords, and property managers alike. If the issue touches tenant complaints, storm losses, or a potential insurance claim, the quality of the inspection can shape the entire process that follows.
Hidden mold is usually a moisture management failure first. If you fix the stain but miss the wet building material or duct problem, the house will tell you again.
Frequently Asked Questions About Home Mold
| Question | Answer |
|---|---|
| What is the first sign of mold in a house? | For many homeowners, it’s a persistent musty or earthy smell. Visible spotting, bubbling paint, staining, and rooms that feel damp are also common early warnings. |
| Can I learn how to check home for mold without a test kit? | Yes. A careful visual inspection, a flashlight, and a moisture meter are often more useful than a simple consumer kit. Start with moisture history, visible changes, and odor patterns. |
| Are DIY mold test kits reliable? | They can serve as a basic screening tool, but they don’t offer the precision of professional methods. They often can’t tell you whether the issue is coming from an active indoor source or from normal outdoor mold entering the home. |
| Where should I check first in a Florida home? | Start with bathrooms, under sinks, laundry connections, around windows, closets on exterior walls, the air handler area, and supply and return vents. In Florida, HVAC and humidity-related areas deserve special attention. |
| Should I clean visible mold myself? | A very small, isolated surface issue may be manageable, but recurring growth, porous materials, hidden odor, or any suspicion of HVAC spread should be evaluated professionally. Cleaning without solving the moisture source usually doesn’t last. |
| Will a professional inspection help with an insurance claim? | It can. Professional documentation is often far more useful than DIY notes because it helps establish the source, extent, and likely cause of the problem, which matters when you’re discussing coverage and remediation scope. |
If you’ve noticed a musty smell, recent water damage, or signs that make you question how to check home for mold, contact AMPM Restoration Services. We serve Bradenton, Sarasota, Tampa Bay, Saint Petersburg, Lakewood Ranch, and surrounding Gulf Coast communities with 24/7 emergency response, free inspections and estimates, insurance claim assistance, and financing options. Don’t wait for a small moisture problem to turn into major structural damage or a larger remediation project. Call 941-946-7807 now for your free inspection and estimate.
